Showing posts with label Turbocharger. Show all posts

12 May 2013

Ian’s Short Ram Intake

I owe a lot of stories to the few of you who actually follow this blog, Matt’s Camaro has taken several leaps forward and a big step back. I’ve also done some work on other cars, and finally have my own project car. But to knock the rust off I will start with a little story that is still fresh in my mind. Ian is a young co-worker of mine, and has been seeking my mentorship in a great deal of auto performance knowledge for the past two years. A while back I helped him install a new exhaust system on a Honda CBR 600 bike of his (which I still owe a write-up on). Recently Ian got himself a nice sporty 2010 Mazdaspeed3 and now he wants it a little more sporty(fun) than stock.

He ordered two things to perk up his car a little. The first is a set of motor mount inserts. The second is a Stage Two Short Ram Intake (SRI). Both of these are from Corksport.com
 
DSCN2325
Totally stock 2010 Mazdaspeed3 engine bay.

DISCLAIMER: This is not instructions for installing these parts, more like a review of the install process. I have some corrections or amendments to the printed instructions that came with the new parts, and some tips to work in addition to the instructions.

DSCN2326

First we installed the motor mount inserts. These are pretty easy to do if you have a jack (that works with the car), jack stands, a 1/2” drive ratchet 17 & 19 mm sockets, and a torque wrench. I suppose you could do it with out the torque wrench, but I wouldn’t recommend it. I mention a jack that works with this car because it sits so low. My floor jack is a high-lift SUV style jack, and when fully depressed still needs about 8 inches of clearance to fit under the car. These Mazdaspeed3s have about 6 inches so we had to improvise a little. I would have simply used my ramps, but they are holding up the back end of a ‘66 Chevelle at the moment. In their place we used some scraps of 2x4. You can judge from the picture how long they were. They worked well enough. Instinct may tell you to screw or nail the boards together, but I have some logic against that practice. We only used the wood to get the car high-enough to get the jack under the front end. Since we were going to use the jack to lift it we would be taking the weight of the car off the front suspension. The suspension is located by an A-arm on each side (one for each wheel), which each move through an arc. Picture wingtips on a bird, as the wings go up and down the distance between the wingtips changes. As we lifted the car the distance between the tires became less, this caused the tires to move in and slide the blocks around a bit. If they had been nailed or screwed together they would have to tip, which could have caused binding and a more dangerous situation. To lift this car with a single floor jack place the jack under the middle of the K-member (named due to its shape). The K-member is a heavy piece of metal that connects the A-arms to the car and supports the back of the engine. Don’t lift on the plastic-work or the bottom of the engine/transmission. If your jack has a metal saddle I recommend placing a 4'”-8” long chunk of 2x4 between the jack’s saddle and the part of the car you are lifting on. This helps save the paint on steel parts and prevents cracking of cast aluminum or cast iron parts.

DSCN2327

After lifting the car we supported it with jack stands under the front sub-frame. If you need help locating this take a look at your owners manual for jack placement when changing a flat tire, from there look just inboard and you will see a build-up of structural metal with a few holes that convey its thickness. Once the weight of the car was on the jack stands and high-enough to crawl under it we moved the jack to the lowest part of the transmission, and lifted an eighth to a quarter of an inch. This is to support the engine while we remove the lower – rear motor mount.

DSCN2328

The three bolts on the aluminum (gray) motor mount. Are labeled 17mm in the instructions, however the car we were working on used 19mm socket to pull those. The two bolts going through the black steel portion of the motor mount are a different style but are very similar, and could be swapped if not careful, take the time to pay attention to the differences. Also while you are down there you may notice a small rectangular box stamped into the bottom of your K-member with the word “FoMoCo” on it. This stands for Ford Motor Company – You’re welcome!

The motor mount comes out pretty easy and the inserts are even easier. At this point the hardest part was getting the car up on the jack stands. Follow the pictures to see how the inserts go in.


DSCN2329DSCN2330DSCN2331

After the inserts are pressed in re-install the mount and its bolts and torque everything to 70 Ft-Lbs. Lower the car back to the ground and take it for a test drive, your car will feel surprisingly different.
Next is the install of the Corksport Sort Ram Intake. This was a little more difficult but with the right tools isn’t too bad. We took our time and had it done in about four hours. One word of caution about the Corksport intake –you may have heard of “cold air intakes” well this is a hot air intake. The factory air-box is sealed from underhood air, in fact, the air filter is fed air from a duct coming from a ram air scoop behind the grill opening. Ian and I took some measurements before and after using a Scantron OBD2 code reader. In the morning before we started the outside temp (indicated by the car’s sensor) was 68 degrees. While driving at 70 mph the Intake Air Temp (IAT) matched the outside air temp. When parked idling for one minute the IAT rose six degrees above the outside temp. After installing this SRI we did notice better throttle response and quicker turbo spooling, however at 70 mph the IAT was 3-4 degrees higher than the outside temp. and rose to six degrees above outside temp. in a mater of a few seconds. We didn’t even bother waiting a full minute.

What this means is this SRI can increase power while the car has air flowing over it, but if you spend lots of time at red lights you are increasing your IAT. Ian will be investing in a heat shield box or the Corksport stage 3 cold air intake in the future.

The turbo inlet pipe is well designed, but the quality of execution was 9.5/10. I noticed some welding slag on the inside, some of which you could almost scrape off with your finger nail. I used a long, straight-tipped screw driver to knock out what I could. It was actually kind of surprising how much I got out.

DSCN2334
This angle shows a few little chunks of welding slag that I knocked out with a long screwdriver. These are small pieces of metal that could get sucked through your turbocharger.
DSCN2337
This shows some of the crud that I scraped out of the inlet pipe.
DSCN2336

The instructions for this job were pretty good, and although we didn’t use them they have links to YouTube videos of the more difficult steps to help you if you’re stuck. The only exceptions here were some hose clamps that had to be turned to give us a little more clearance for the turbo inlet pipe and just a reminder, the grommet that you need to transfer from the old pipe to the new one includes a small metal sleeve/washer piece that may be stuck on the stud on the side of the engine. Be sure to get that into the rubber grommet before trying to install the pipe. Also we took the time to un-bolt a bracket under the battery tray that anchored the wire-harness that led to the ECU (computer). This allowed us to move the harness back and forth with out bending the bracket all to heck. Follow the instructions until you get to the point of tightening the 2”-2.5” coupler to the turbo. By the way. This is low pressure plumbing. Tightening the t-bolt clamps enough to see them slightly compress the silicone couplers should be adequate. Lastly the snap to connect fitting for the valve cover breather hose can be a finicky one, and you can make a tool out of a paperclip like the instructions suggested, or you can go to the auto parts store and get a set of fuel line quick connector tools. I think it was 5/8” or 3/4” that did the trick. Up to you if you want to spend a few bucks on them. I would recommend it if you spend much time spinning wrenches.

DSCN2332
Ian had a pro shop instal a big stereo system into his car. They connected the positive cable for the amp to the bolt that is to only be used for clamping the connector to the battery terminal. We relocated the power wire to the terminal with the black/red wire, next to the white wire. We also did a better job of routing the power wire out the bottom of the battery box.
DSCN2333DSCN2338

Lots of reviews and forums mention how difficult it was to tighten the T-bolt clamp on the intake of the turbocharger. I’ll tell you it’s very easy if you have a 24” extension on your 3/8 drive ratchet. Which can reach down between the firewall and the engine. I strongly recommend getting on even if it’s a cheapo from wal*mart. These stupid long extensions have really earned their keep with exhaust and transmission work lately.

The Boost Control Solenoid’s tube seemed a little loose on the brass fitting of the turbo inlet pipe. We used one medium sized zip-tie to clamp it down a bit. Again this is low pressure plumbing and often has vacuum on it. Nothing needs to be super tight on this section of the intake.

I found another situation with the “air straightener” on the new MAF housing. In general the build quality of the MAF housing body is great. What I didn’t like is the little bit of flashing on the middle of the vanes of the plastic “air straightener” its self. It was a simple fix with a file (an emery board could be used as well). It may not have caused any problem, but if I’m here, I fix what’s wrong. Also I recommend getting a can of “Mass Air Flow sensor” cleaner. Yes, this is specific stuff, you can not use water, WD-40, alcohol, or brake cleaner for cleaning the sensor, but it is worth it in the mileage and drive-ability to buy the can, I can promise that. And you can use the MAF sensor cleaner on other things such as other sensors and more rugged electronics through out your car (connectors, light sockets, etc.)

DSCN2339DSCN2340
DSCN2341

The duct that led to the factory air box pulls out of the car easily. And I wanted to keep it, yet in stock form it turned down and missed the new air filter. I hacked the turn-down off with a hacksaw and smoothed the edge with some sandpaper. Finally I zip-tied it to a small tube running along the top of the radiator just to help hold it in place.

DSCN2342
DSCN2343
DSCN2346
DSCN2345
Ian's car with a Stage 2 short ram intake and an upgraded motor mount.


11 June 2012

Fixing my truck part 1

   Saturday was a productive day for me: I spent eight hours working on the truck then rode my new bicycle for 16Km (10 miles). You probably don't care too much about the details of the bike ride, so let me tell you about my experience of working on the truck. I'd like to start out with some advise for others whom dabble in work on cars: If you can spend a few minutes getting stuff out of your way it will probably benefit you greatly the first time you do a job on a vehicle.

   The first thing I did with my truck is set up a quick shade style canopy. This was my wife's idea, and a pretty good one at that. It made working out in the 100 degree Texas sun bearable.

The canopy was my wonderful wife's idea and made working on the truck as pleasant as it could be for working outside in a Texas Summer.

   The second bit of advise I have for someone, anyone doing really serious work on a vehicle for the first time, is document everything! It doesn't matter how you do it. In the past I've used a notebook, but recently I've learned of a cool new invention called the digital camera, granted it helps to have a friend to snap the pictures so you don't get slowed down too much.

A picture of the engine shortly after starting work on it notice the batteries are disconnected and a degas (aka coolant tank) is unbolted from it's normal location.
   Pictures that document specific connections can really help you out later, since they show all of the detail of color and size and most cameras number them in order, so reassembly is simply a matter of looking at the pics in reverse order.

An example of documenting with pictures, now I know the where that plug with the white/red wire goes :)

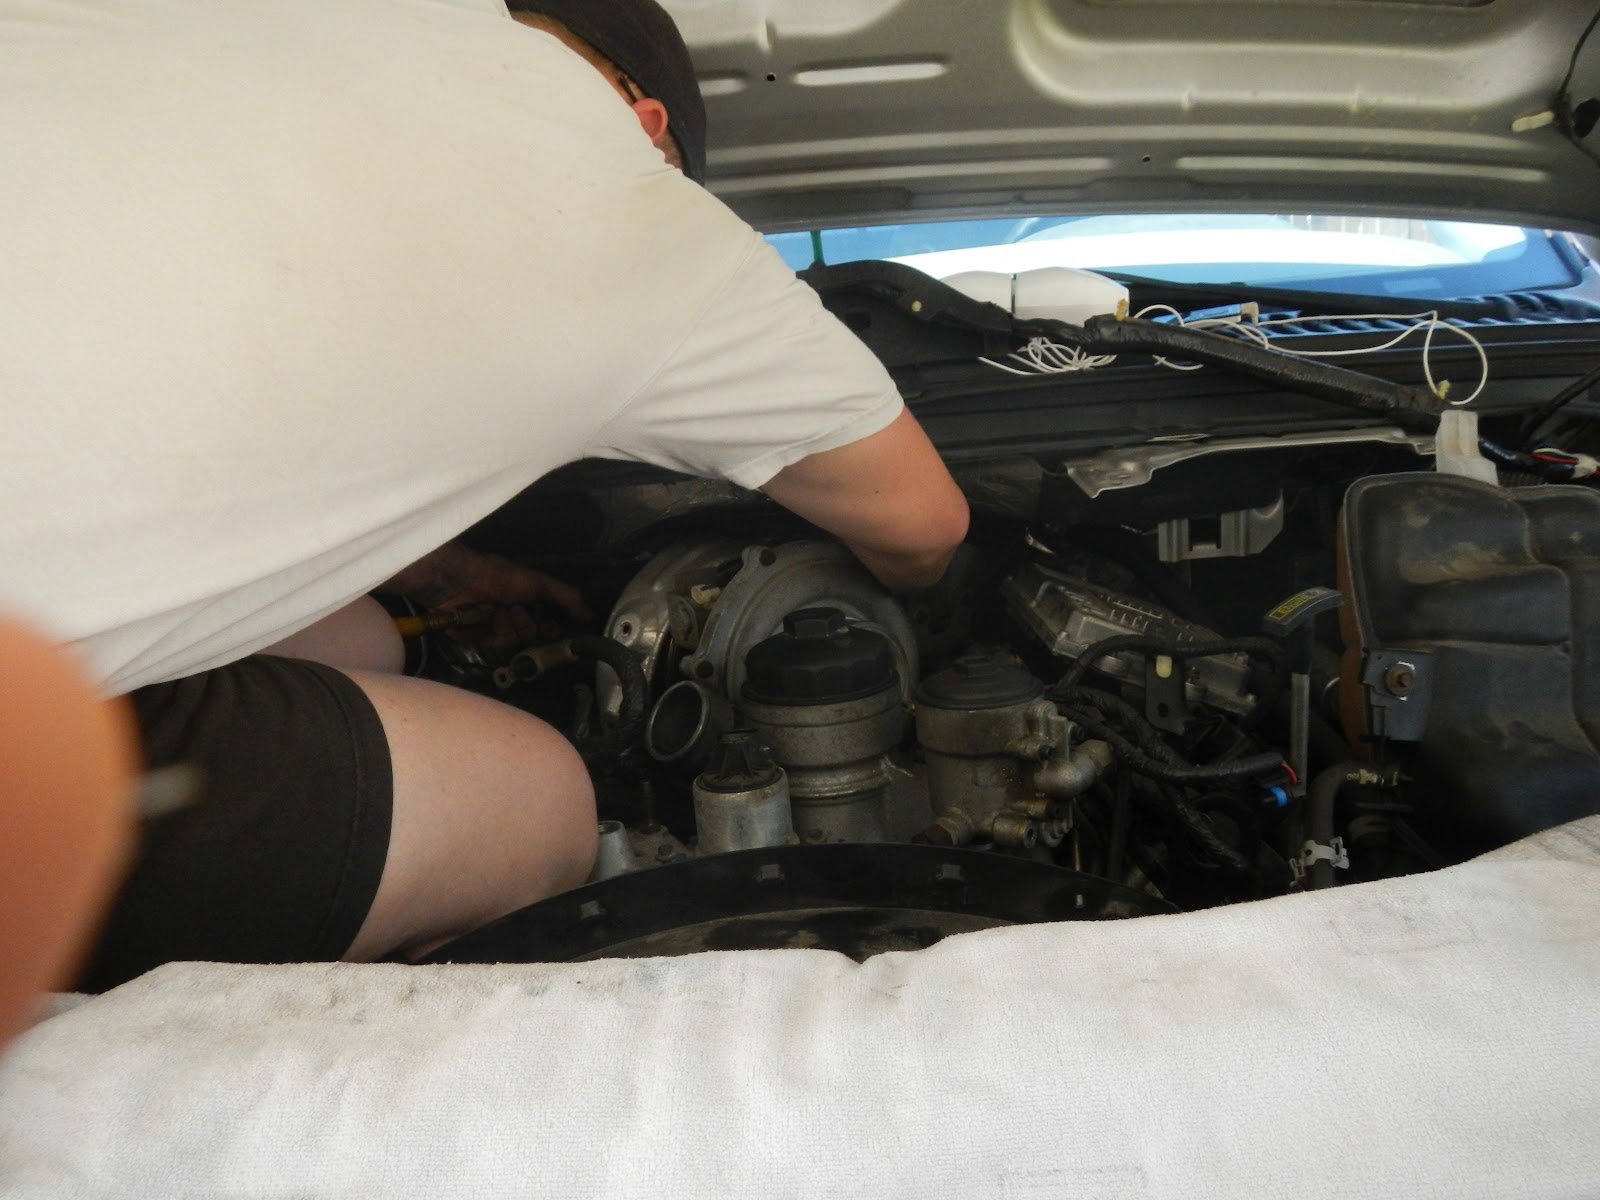
   The things I removed included: the batteries (most diesel trucks have at least two), the air filter assembly, both of the charge air cooler (some people call it intercooler but that's a different story) tubes, the alternator, and as much of the fan shroud as possible. I personally really get into my work, literally. I'm flexible, and can get into tighter spaces than most mechanics. After removing the batteries from the truck I found the passenger side battery tray a suitable perch to work from.

This picture is courtesy of my 8 yr old daughter "Monster". I didn't know she was taking it, but it shows off how in, literally and figuratively, to my work I get.

   What can I say about all the work...  I guess I owe a big shout out to srmastertech on youtube. He has some fantastic videos and a wealth of experience working on late model Fords. After watching his videos the only thing that I had trouble with was the fact that there was a third bolt holding down my turbo from the back. Many references mention removing the back bolt then the front bolt which implies just two bolts. I found two bolts oriented horizontally going through the turbo pedestal onto the exhaust side volute. Then I started prying up on the turbo to un-seat it from the pedestal and oil drain tube. I spent 45 minutes and a great deal of energy on this until I happened to notice a third bolt oriented vertically almost directly under the exhaust side outlet of the turbo. Obviously, once this bolt was removed the turbo came out with almost no fuss at all.

After much prying and a few choice words, there it is, my turbo. I wish I was pulling it to upgrade it. But if that time comes, I'll know what to do.
   Once the turbo was out of the truck, I was able to do a little bit of investigation. If you aren't spun up on why I was doing all of this, let me bring you up to speed. I used my truck to tow my friends Camaro. Plenty of starts and stops, even hopped a curb to help someone jump-start their dead battery, you know a typical day in the life of a truck. The whole day the truck ran like a charm--no trouble at all. I parked it in my driveway late that night after a decent days work. The next morning, when I tried to drive to the store, the engine cranked, but it wouldn't start. No fire at all. The best way to explain it is trying to start a gasoline engine with a brand new battery and no fuel in it at all.

   I spent a day ruling out things like fuses, relays, and wire damage--to no avail. Next I went to the internet to learn about the wealth of faults that the 6.0 Power Stroke engine has (hence my previous blog entry). Let me give you a rundown of how these trucks work. Older style diesels (the first generation of 5.9 Cummins found in Dodge trucks and the 6.2/6.5 Detroit Diesel made V8 engines found in the '80s Chevrolet and GMC trucks used mechanical fuel injection pumps. Diesel engines require the fuel to be injected into the engine at a rather high pressure, typically the minimum is about 2,000 PSI (the higher the better for increased power, quieter operation and less smoke out the exhaust). The mechanical pumps in these engines did several jobs. First they were almost like a distributor used for spark plugs in that they routed the fuel to each cylinder at the right time, and in the right amount. Second they throttled the engine. Gas engines are throttled (varied in speed, you know with a gas pedal, etc) by how much air you let into the intake of the engine, fuel volume is controlled to match the volume of air flow. Diesel engines run with wide open air flow, instead they are throttled by how much fuel is injected into the engine. The third job those mechanical pumps had was to shut off the fuel when you turned the key off, thus shutting the engine off.

   Those 5.9 Cummins, 6.2/6.5 Detroits and the International Harvester made 6.9 and (pre-Power Stroke) 7.3 were very reliable engines, and simpler to keep running than any gas engine in any vehicle. The only shortcoming(s) were power output and (to some) their dirty exhaust. The new diesels today easily make more power than a supercar and can do it while hauling almost anything including the kitchen sink. The original 7.3 Power Stroke was the first to hit the market with a computer controlled injection system which made increasing power as easy as "chipping" or re-tuning any modern fuel injected gas powered car. GM soldiered on with it's 6.5 until it got the respectable Duramax in 2001, The Duramax (designed in colaboration with Isuzu) was ahead of the game with using a common rail injection system. Dodge stayed the course with it's mechanically injected 5.9 Cummins until the 5.9 joined the 6.6 Durmax in the world of common rails, this was driven by the aforementioned increased emissions regulations. Ford, and it's partner International, went a whole new route, they started with a clean sheet design, this resulted in the 6.0 Power Stroke.

   Now the general mechanics of the engine is fine. It's very rare that any one ever has a problem with the bottom end. Most of the common problems on these engines involve components and methods that that differ from the Duramax and Cummins engines. Namely the method that the fuel injection functions. The Duramax and Cummins engines use an expensive pump to pressurize fuel up to the thousands of PSI that is needed for proper injections, the injectors are relatively simply yet expensive to build valves that open and close at the right time to induce fuel to the engine. The method used on 7.3 and 6.0 Power Strokes involve a High Pressure Oil Pump (HPOP) and very complicated, yet easier to manufacture Hydraulic Electronic Unit Injectors (HEUI). Like all engines the Power Strokes use a typical "low pressure" oil pump which lubricates the engine and operates between 10-60 PSI. This regular oil pump also feeds the HPOP which can squeeze oil to pressures in excess of 500 PSI.
Fuel is pumped to the engine and eventually the injectors at about 50-60 PSI, which is similar to where gas engines need there fuel pressure at. The fuel is routed to a chamber near the tip of the injector. The electronically operated valve at the top of the injector opens to let high pressure oil in to a chamber and is allowed to press down on a piston within the injector. This oil-chamber piston is larger in diameter than the fuel-chamber piston and allows a multiplication of force. 500 PSI on the oil side turns to more than 2,000 PSI on the fuel side.

   With all of that out of the way, what I've learned is that my truck is not getting enough pressure from the HPOP. The high pressure oil system has two critical components besides the pump. These are the Injection Pressure Regulator (IPR) and the Injection Pressure Sensor (IPS). The IPR is an electronic valve which the computer uses to regulate the oil pressure going to the injectors. The IPS is how the computer tracks the oil pressure and it's signal, in turn, affects what the computer will do with the IPR. Throughout the high pressure oil system there are several seals, gaskets and plugs that are known to have problems on the 6.0. Over time they were upgraded and re-engineered. In short the materials originally used were not up to par with the technology they were supporting.

  My truck was only building about 300 PSI of pressure from the HPOP. There are several components that, when failing, will result in almost no oil pressure. Since I'm getting a few hundred PSI, I believe the major components are operating properly, and that I have a leak some where. The good news is that a seal or o-ring is cheaper than any of the major components, the bad news is there are lots of o-rings and seals in this system. And finding the failing seal(s) is a hunt in every essence of the word.

   My truck is partially torn apart and I haven't gotten to the problem(s) yet. But I made a lot of head-way in the effort to fix it. This story will continue in future posts but for now I will leave you with a few pictures of my little adventure. Thanks for reading, please feel free to comment!

A picture of your Author, just in case you wondered.

Yes that's a lug wrench, I didn't have a proper pry bar at the time. A problem I just resolved.

A 6.0 Power Stroke sans Turbocharger (as well as the alternator and a few other things).

In addition to the no start problem, I've also had very minor oil leak. I think the orange hose in the bottom of this picture is the culprit. Notice the oil stain on that white bar-code sticker is starting at the bottom and going up.

This is the housing for my oil filter. I'm a little concerned that it was so empty. Unfortunately, I don't know enough about this engine to know if this is normal. On the left side of the picture, you can again see a mess of oil. The cylindrical object on the right with the black connector is my EGR valve.

Here is a close up of the EGR valve. Yes, this soot is going back into the engine. I'm not sure what I'm going to do about this yet...

The intake side of my IPR showing the filter screen, I would have preferred to not see the few little specs on the filter-screen, but compared to some of the IPRs I've seen on these trucks, I'm considering my self lucky. More debris on this screen could imply a failing HPOP, which is a very expensive part.

27 May 2012

Introduction

Hello,
   Welcome to my blog. I plan on using this to share some of my projects. I'm a tinkerer, and love to know how things work. I enjoy fixing things, and teaching people about technical subjects. Currently the projects on my to-do list include: evaluation efficiency of wheels and drive train designs of LEGO Technic and Mindstorms models, updating the brakes and suspension of a 1967 Chevy Camaro (a friend's car), and building myself an SVO Mustang.

   If you can name it then I've either driven it, broke it, or fixed it. I've always been very mechanically inclined. When I was six years old my Dad was teaching me about carburetors and brake systems. When I was eight to ten I was often taking things apart to learn about them. Such things include, my bike, TVs, tape decks (cassette and 8-track), remote controlled toys, stereos and anything else that could be torn apart and possibly re-assembled. For a while my attention turned to plastic models of cars and planes; specifically World War Two aircraft, all the while I was fascinated we LEGO Technic.

   Eventually I got into high-school and got really interested in cars. I was fortunate enough to have an auto shop available (complete with a Dragster Team) and a teacher whom I still consider as one of my best mentors. Also available at that school was a metal shop, where I learned welding and machining. This school was a smaller school in North West Oregon, and yes it did have a "school of forestry" and plenty of kids active in FFA. Yet it was a very diverse school and also had a club that sparked a new interest in me. This club was called Electron Run, and we built and drove and race electric cars.

   These were not regular production cars converted to electric, nor were they small toy cars. They were purpose-built cars designed for efficiency and speed. The rules were pretty simple: the car had to have at least three wheels, it had to have brakes on at least two of the wheels, it must have a proper seat-belt and roll-bar, and it was limited to a max of 64 pounds (29 Kg) of lead-acid batteries. Teams from around the state would meet during the spring and take-over a parking lot. A mini-Indy style track would be made with small orange cones, typically .25-.33 miles long. The format of the race was to get as many laps as possible in one hour. My freshman year we won first in state with out ever getting first in a single race, but by consistently placing near the top and being at every race.

   In addition to this I met the Love of my life, her crazy family, and her 1965 Chrysler New Yorker. We've been married since September of 2000, and the Chrysler (named Ramble) currently lives with my parents and has over 400,000 miles on the original drivetrain.

   After high school I joined the Air Force. I won't go in to detail about what I do here, but I will say that I spend a lot of time using radios, computers, interesting vehicles, and other cool toys. Shortly after arriving at my first duty station (in Hawaii), I bought an 1984 Mustang SVO. I loved that car and it really opened my eyes about automotive performance. Before then all I knew was muscle cars, carbs and V-8 engines. Now here I was driving a small, light, turbocharged, fuel injected, four cylinder car with a very interesting "personality". I had that car for the better part of seven years, and miss it dearly now. I will have one again, I'm just waiting for the time to be right. ;)

   After Hawaii I moved to South Carolina where I acquired a '68 Mercury Cougar; and a diesel 2005 Ford F-250; and two kids, one daughter and one son. And started to learn about file and web page servers. After SC we moved to Germany, where I started to become interested in renewable energy, and rediscovered LEGO Technic (apparently it's quite common for Adult Fans Of LEGO or AFOLs to go through "dark years" such as I did).  Now I live in Texas, and since I'm back in the states I can get into my other interests of cars, bikes and tinkering in general.

   Hopefully my future posts will teach you something and inspire you to learn about things around you. Please feel free to ask questions about anything you see in these posts.